


Here are the top features of GLPI
- Inventory Management – For computers, computers, peripherals, network printers e.t.c.
- Item lifecycle management
- Incidents, requests, problems and changes management
- Data Center Infrastructure Management (DCIM)
- Licenses management (ITIL compliant)
- Management of warranty and financial information (purchase order, warranty and extension, damping)
- Management of contracts, contacts, documents related to inventory items
- Knowledge base and Frequently-Asked Questions (FAQ)
- Asset reservation
All features of GLPI are available on the project website.
Install GLPI on Ubuntu 18.04 LTS
We will cover the steps of installing GLPI on Ubuntu 18.04 LTS in the remaining sections. Before you can follow this guide along, you need to have a fresh installation of Ubuntu 18.04 and user account with sudo privileges.
Step 1:Update Ubuntu
As usual, ensure your packages list is up to date.
sudo apt update
You can also upgrade installed packages by running the following command.
sudo apt -y upgrade
Step 2: Install MariaDB database server
GLPI requires a relational database to store its data. Let’s install MariaDB on Ubuntu 18.04 by using our guide:
After the installation, Login to your database as root user.
$ mysql -u root -p
Create a database and user for GLPI.
CREATE DATABASE glpi;
CREATE USER 'glpi'@'localhost' IDENTIFIED BY 'StrongDBPassword';
GRANT ALL PRIVILEGES ON glpi.* TO 'glpi'@'localhost';
FLUSH PRIVILEGES;
exit;
Step 2: Install PHP and Apache
We need to have Apache web server and PHP installed for GLPI to run and be accessed from a web interface.
sudo apt-get -y install php php-{curl,gd,imagick,intl,apcu,recode,memcache,imap,mysql,cas,ldap,tidy,pear,xmlrpc,pspell,gettext,mbstring,json,iconv,xml,gd,xsl}
Then install Apache and its PHP module.
sudo apt-get -y install apache2 libapache2-mod-php
Step 3: Download and Install GLPI
Download the latest stable release of GLPI. It follows a semantic versioning scheme, on 3 digits, where the first one is the major release, the second the minor and the third the fix release.
Check for the latest stable release on the Downloads page. As of this writing, this is
9.3.3.sudo apt-get -y install wget export VER="9.3.3" wget https://github.com/glpi-project/glpi/releases/download/$VER/glpi-$VER.tgz
Uncompress the downloaded the archive
tar xvf glpi-$VER.tgz
Move the created
glpi folder to the /srv directory.sudo mv glpi /srv/
Give Apache user ownership of the directory
sudo chown -R www-data:www-data /srv/glpi/
Step 4: Finish GLPI installation
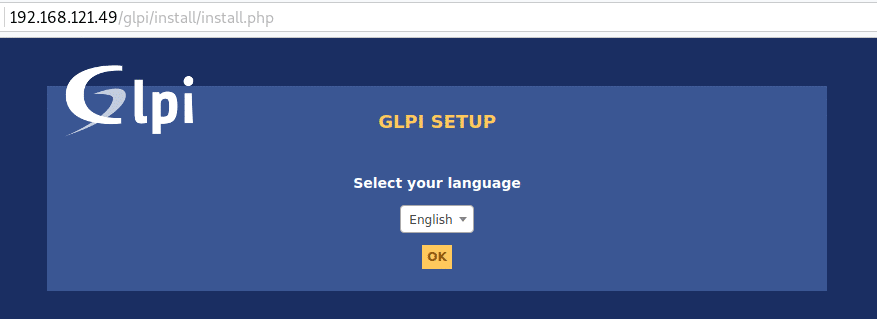
Visit your server IP or hostname URL on . If it is your local machine, you can use:http://127.0.0.1/glpi/install/install.php
/glpi
On the first page, Select your language.
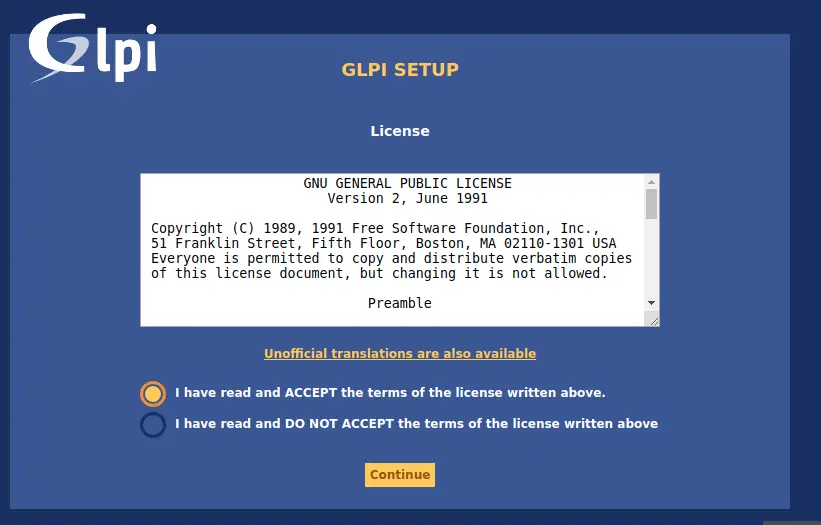
Accept License terms and click “Continue“.
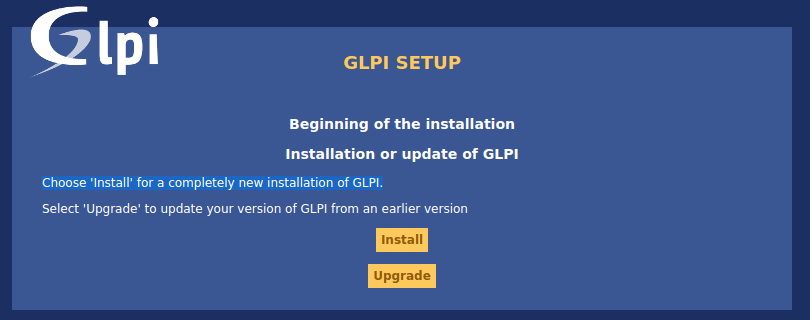
Choose ‘Install‘ for a completely new installation of GLPI.
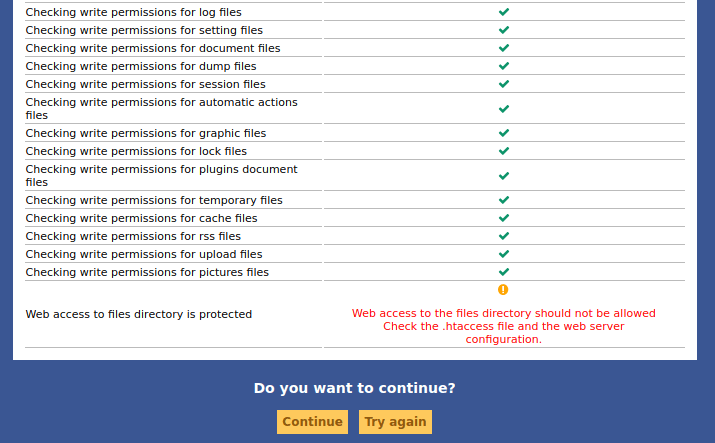
Confirm that the Checks for the compatibility of your environment with the execution of GLPI is successful.
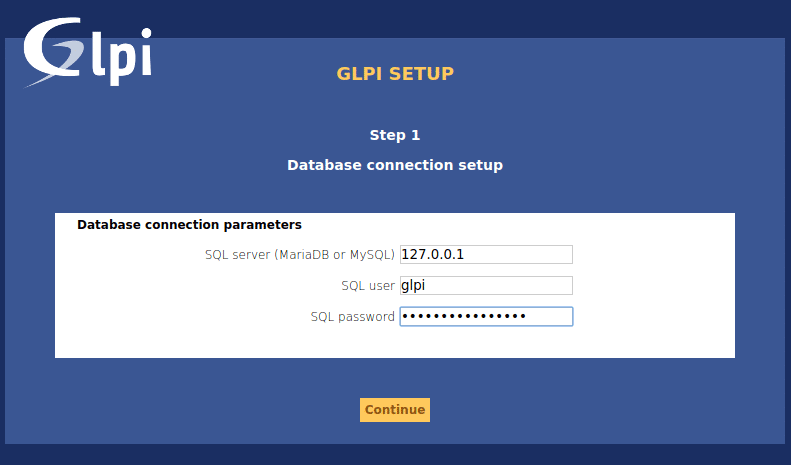
Configure Database connection
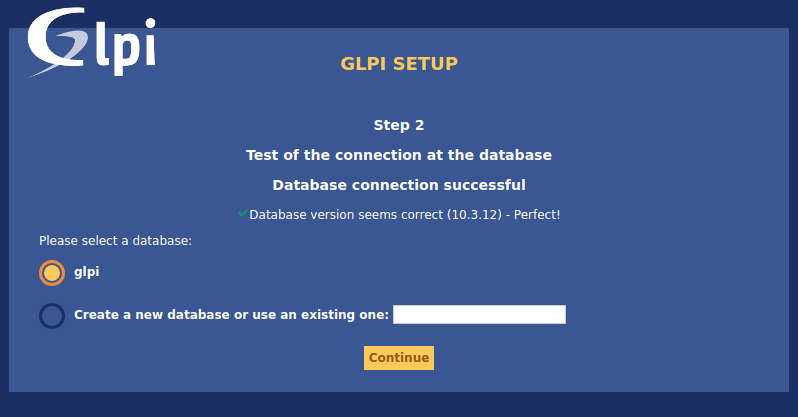
Select glpi database to initialize.
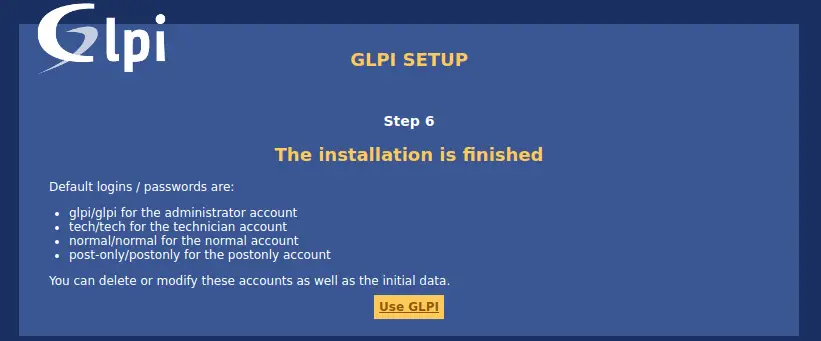
Finish the other setup steps to start using GLPI.
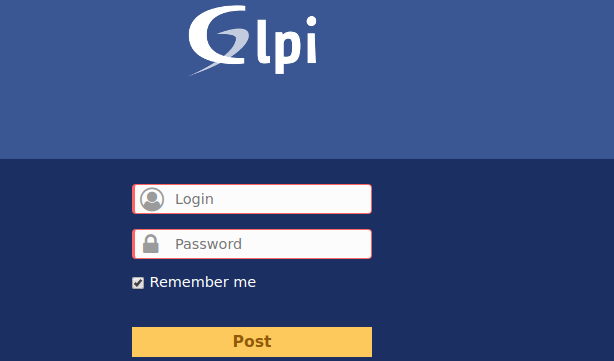
You should get the login page.
Default logins / passwords are:
- glpi/glpi for the administrator account
- tech/tech for the technician account
- normal/normal for the normal account
- post-only/postonly for the postonly account
On first login, you’re asked to change the password. Please set new password before configuring GLPI. This is done under Administration > Users.
This marks the end of installing GLPI on Ubuntu 18.04. The next sections are about adding assets and other IT Management stuff for your infrastructure/environment. For this, please refer to the official GLPI documentation.

Social